

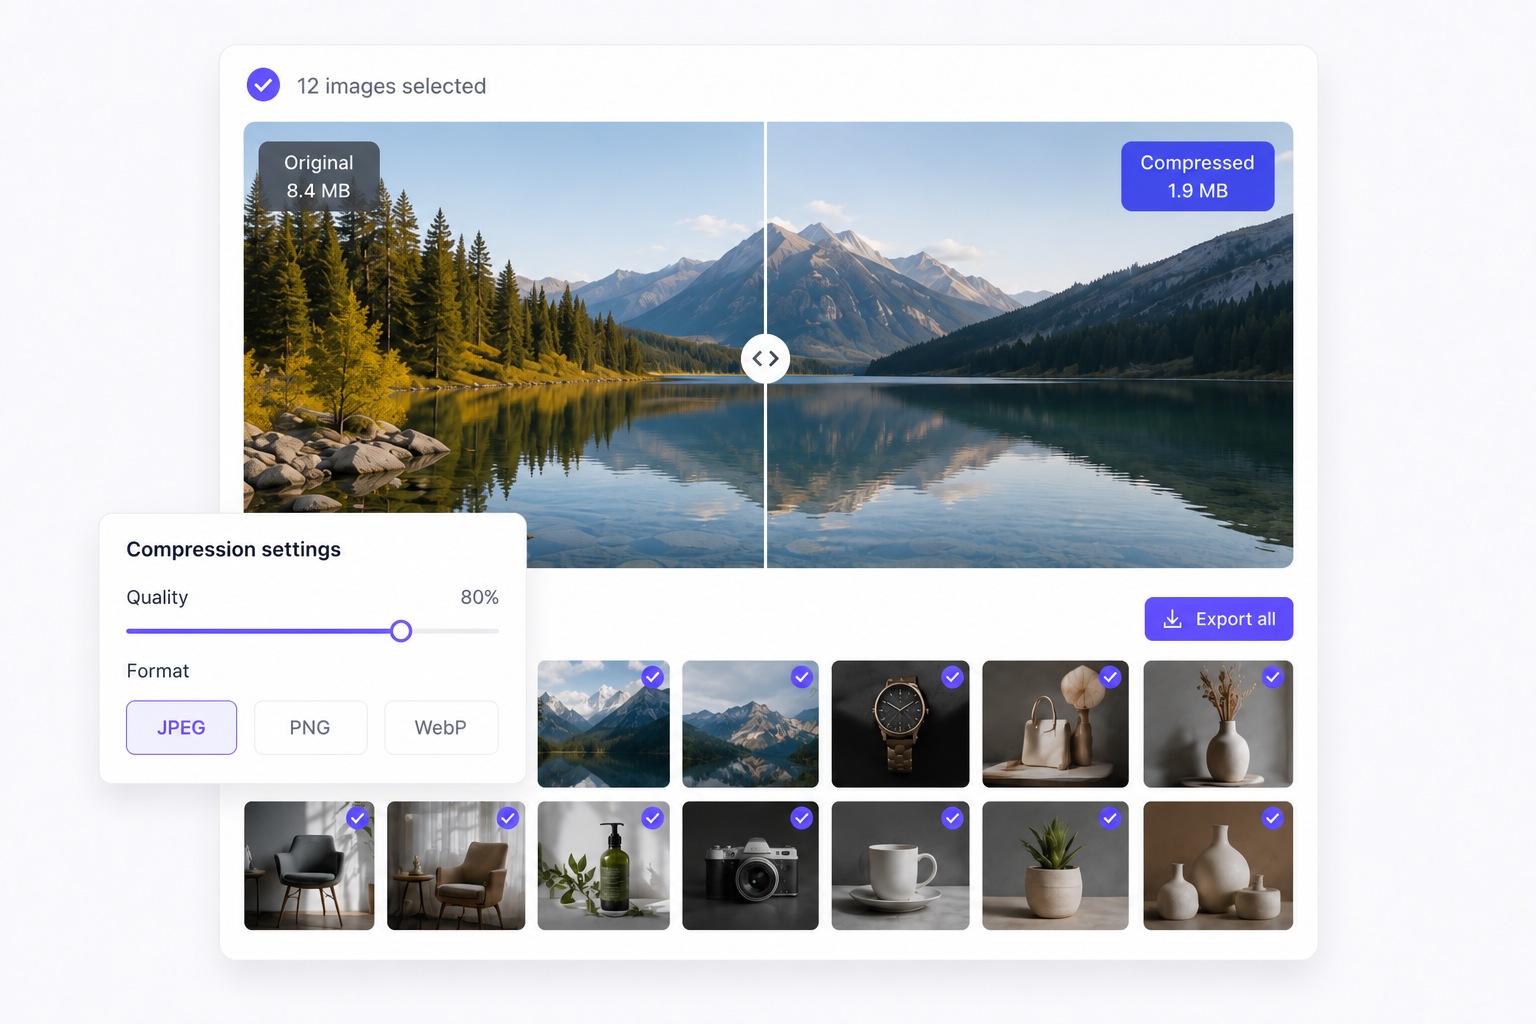
A ZIP of 200 product photos hits 180 MB. Your CMS rejects uploads over 5 MB. Email clients strip large inline images. The fix is always the same: compress — but doing it file by file, or guessing quality settings per format, burns time you do not have.
Bulk image compress should show estimated savings on every file before you commit, then export the whole batch in one click.
Why compression workflows stall
- Unknown output size — Without a preview, you compress blindly and re-run exports when files are still too large.
- Format confusion — JPEG, PNG, and WebP behave differently; teams often export PNG screenshots that should be WebP or JPEG.
- Quality vs size tradeoffs — "High quality" on one tool means something different on another; batch jobs need one consistent setting.
- Scattered tools — Compress here, rename there. The same folder gets processed multiple times before it is ready to ship.
How bulkimage.io compress works
The bulk image compress tool lets you set one quality level and output format for the entire queue. See original vs estimated size on each file, adjust until the batch fits your target, then download or chain rename and watermark steps.
Standard compression runs locally in your browser — your files stay on-device.
Key features
- Format conversion — Export as JPEG, PNG, or WebP; WebP typically saves 25–35% vs JPEG at similar quality.
- Quality presets — From max compression to balanced to high quality; pick once, apply everywhere.
- Per-file savings preview — Estimated output size and percent saved before export.
- Mixed input folders — JPEG, PNG, and WebP in one upload queue.
- Pipeline ready — Compress after crop or resize without re-uploading.
Common compress workflows
- E-commerce listing prep — Crop to 1:1 → compress to under 200 KB per image → prefix rename → ZIP for marketplace upload.
- Blog and docs performance — Resize to display width → compress → export WebP for faster LCP and lower bandwidth.
- Client delivery packages — Compress agency exports before sending download links; keep quality consistent across the set.
- Internal asset libraries — Batch shrink archived screenshots and UI captures to reduce storage without re-organizing folders.
Tips for the best balance
- Match format to content — Photos → JPEG or WebP; UI with transparency → PNG or WebP; avoid PNG for photo batches.
- Resize before compress — Oversized pixels compress poorly; set final dimensions first for smaller, sharper outputs.
- Preview the outliers — Check the largest files in the queue; one high-res PNG often dominates total ZIP size.
Getting started
Upload batch → choose format & quality → review savings → export
- Upload — Add JPEG, PNG, or WebP files to the queue.
- Configure — Select output format and quality; watch estimated sizes update per file.
- Export — Download the lighter batch, or continue to watermark and rename in the same editor.
Ready to cut folder weight without opening Photoshop? Try the bulk image compress tool on your next upload.